We accept OEM & Customization. Low MOQ, Easy To Start. MOQ: 50 PCS.
Features of Modern Bedroom Smart Fan Lights
Modern bedroom smart fan lights integrate advanced technology to enhance comfort, convenience, and energy efficiency.
Here are some key features:
1. Smart Control
- Voice Control: Compatible with popular voice assistants like Amazon Alexa, Google Assistant, and Apple HomeKit for hands-free operation.
- Mobile App Control: Use smartphone apps (e.g., Kasa, SmartThings, Philips Hue) to control fan speed, light settings, and modes remotely.
- Scene Creation: Pre-set scenes for different times of day (e.g., “Goodnight” mode for dim lighting and low fan speed).
2. Energy Efficiency
- LED Lighting: Energy-efficient LED lights with long lifespans and low power consumption.
- Dimmable Lights: Adjust brightness levels to suit various moods or activities.
- Energy Monitoring: Some models allow tracking of energy usage via the smart app.
3. Multi-Speed Fan
- Variable Speed Settings: Multiple fan speed options for personalized airflow.
- Reversible Motor: Some models feature reversible motors for seasonal use (forward for cooling, reverse for circulation during colder months).
- Timer Function: Set timers for automatic shut-off after a specified period.
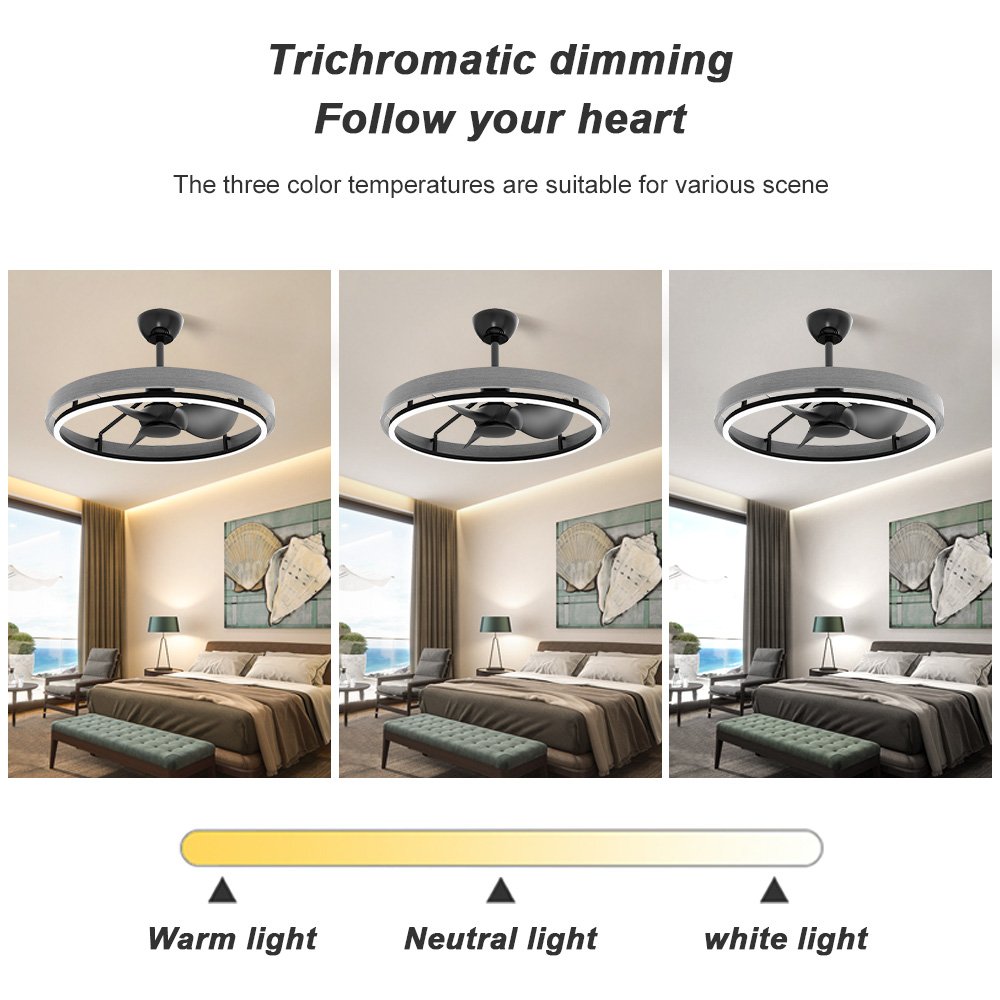
4. Lighting Customization
- Color Temperature Control: Adjust the color temperature from warm to cool (e.g., 2700K to 6500K) to create different atmospheres.
- RGB Color Changing: Some models offer RGB color-changing capabilities for customizable lighting effects.
- Light Effects: Pre-set lighting effects like sunrise/sunset simulations or breathing light modes.
5. Remote and Local Control
- Wall Switch Compatibility: Works with existing wall switches for local control, often with “smart” wall switches for enhanced functionality.
- RF or Wi-Fi Connectivity: Some use RF (radio frequency) for local control, while others rely on Wi-Fi for smart features.
6. Safety Features
- Overheat Protection: Built-in protection to prevent overheating of the motor or lights.
- Child Lock: Some models offer a child lock feature to prevent accidental changes in settings.
- Tilt Sensor: Automatic shut-off if the fan is tilted beyond a safe angle.
7. Aesthetic Design
- Sleek and Modern Design: Sleek, minimalist designs that complement contemporary bedroom aesthetics.
- Blade Options: Available with or without blades (bladeless designs are also popular for a modern look).
- Finish Options: Various finish options (e.g., white, black, brushed nickel) to match bedroom decor.
8. Additional Features
- Built-in Speakers: Some smart fan lights include built-in speakers for playing music or answering calls (e.g., ** Fan Light**).
- Humidity and Temperature Sensors: Integrated sensors to adjust fan and light settings based on room conditions.
- Night Light Function: Soft night light mode for easy navigation in the dark without disturbing sleep.
Installation Steps for Modern Bedroom Smart Fan Lights
Step 1: Gather Tools and Materials
- Ladder: For accessing the ceiling.
- Screwdriver: For removing old fixtures and securing new ones.
- Wire Cutters/Strippers: For handling electrical wires.
- Level: To ensure the fan is installed straight.
- Pencil: For marking installation points.
- Wiring Diagram: Refer to the fan’s wiring diagram for correct connections.
- Electrical Tester: To check for live wires before starting.
Step 2: Turn Off Power
- Switch off the power to the ceiling fixture at the circuit breaker.
- Use an electrical tester to confirm that the power is off before proceeding.
Step 3: Remove Old Fixture (If Applicable)
- Unscrew and remove the old light fixture or fan from the ceiling.
- Disconnect the wires by unscrewing the wire nuts or terminal screws.
- Tag or label the wires (hot, neutral, ground) for easy reference during installation.
Step 4: Mount the Fan Housing
- Inspect the Ceiling Box: Ensure the ceiling box is rated for the weight of the fan (most boxes are rated for 30-35 lbs). If not, install a fan-rated brace.
- Attach the Mounting Bracket: Install the provided mounting bracket onto the ceiling box. Use the appropriate screws and ensure it is level.
- Install the Fan Housing: Attach the fan housing (motor housing) to the mounting bracket. Tighten the screws securely but do not overtighten.
Step 5: Connect the Wires
- Identify the Wires:
- Hot Wire (Usually black or red): Connects to the fan’s hot wire terminal.
- Neutral Wire (Usually white): Connects to the fan’s neutral wire terminal (if applicable).
- Ground Wire (Usually green or bare copper): Connects to the fan’s ground terminal.
- Connect the Wires:
- Twist the corresponding wires together and secure with wire nuts.
- If your fan has a light kit, connect the light wires according to the provided wiring diagram.
- Secure the Wires: Once connected, tuck the wires up into the ceiling box and secure the fan housing.
Step 6: Install the Fan Blades and Light Kit
- Attach the Blades: Most smart fan lights come with pre-assembled blades. Attach them to the motor housing using the provided hardware. Ensure they are tightened securely but not overtightened to avoid damage.
- Install the Light Kit: If your fan comes with a light kit, attach it according to the manufacturer’s instructions. This usually involves securing the light assembly to the fan housing and connecting the light wires (if not pre-connected).
Step 7: Test the Fan and Light
- Turn On the Power: Go to the circuit breaker and turn the power back on.
- Test the Fan: Turn on the fan using the wall switch (if applicable) or the smart app. Ensure it operates correctly and quietly.
- Test the Light: If your fan has a light kit, turn on the light and adjust the brightness or color settings using the smart app or wall switch.
Step 8: Pair with Smart Home System
- Download the App: Download the manufacturer’s app (e.g., Kasa, Wyze, Philips Hue) from the App Store or Google Play.
- Create an Account: Sign up for an account if required.
- Add the Device: Follow the app’s instructions to add the smart fan light to your network. This usually involves selecting the device type, entering your Wi-Fi credentials, and following on-screen prompts.
- Configure Settings: Once paired, configure settings such as fan speed, light brightness, color temperature, and any additional features (e.g., timers, scenes).
Step 9: Final Adjustments
- Check for Level: Use a level to ensure the fan is installed straight. Make adjustments if necessary.
- Adjust Blade Pitch: Some fans allow you to adjust the blade pitch for optimal airflow.
- Test Smart Features: Test all smart features, including voice control, app control, and any automated settings you’ve configured.
Conclusion
Modern bedroom smart fan lights offer a range of features that enhance comfort, convenience, and energy efficiency. With smart control options, customizable lighting, and multi-speed fans, these devices are ideal for creating a comfortable and tech-savvy bedroom environment. The installation process is relatively straightforward but requires attention to detail, especially when handling electrical connections.