We accept OEM & Customization. Low MOQ, Easy To Start. MOQ: 50 PCS.
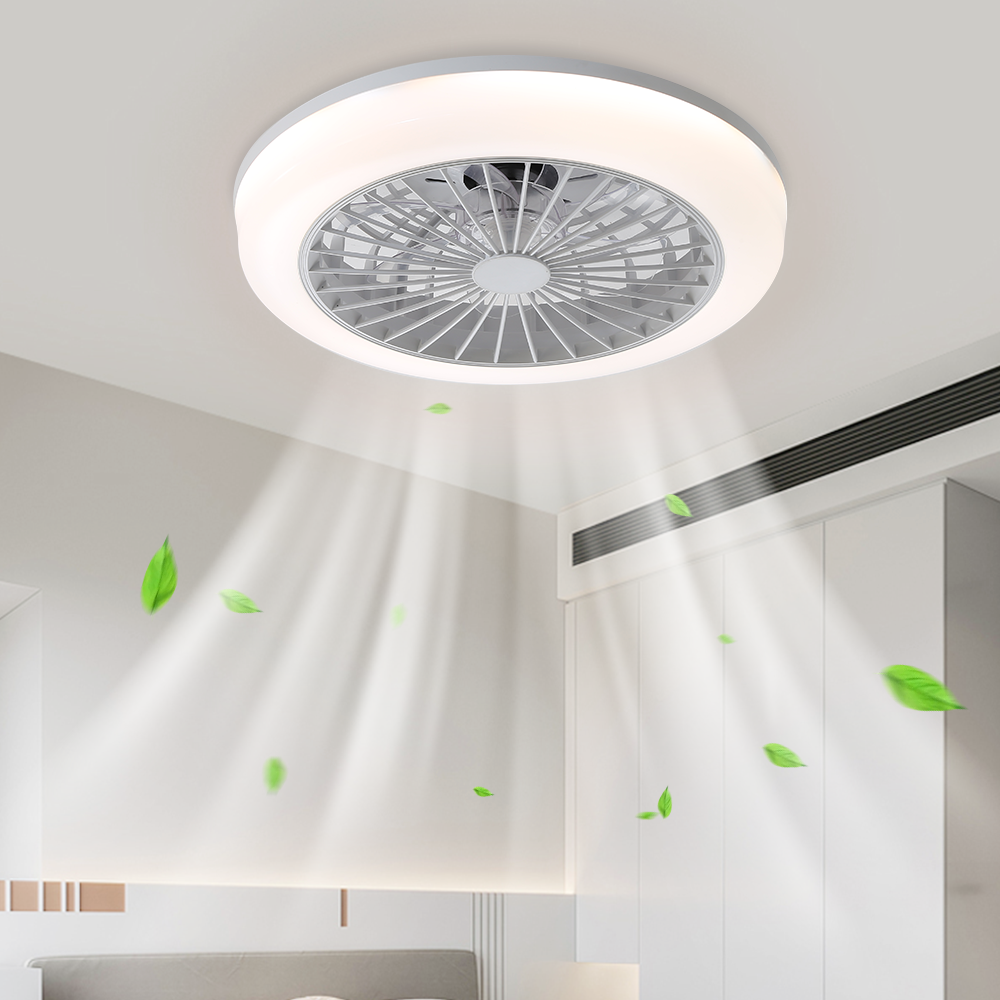
3-Speed RGB Ceiling Fan Light Installation Guide
Installing a 3-speed RGB ceiling fan light enhances cooling, lighting, and ambiance in your space. Follow these steps for a safe and efficient installation:
Tools & Materials Needed
- Screwdriver (Phillips/flathead)
- Ladder
- Wire strippers
- Voltage tester
- Included fan components (motor assembly, blades, light fixtures, downrod, RGB control remote/module, mounting bracket, screws)
Installation Steps
- Prepare the Location
- Turn off the power to the ceiling circuit at the breaker box. Verify with a voltage tester.
- Ensure the ceiling structure supports the fan’s weight (check manufacturer specs).
- Remove existing fixtures if replacing an old fan.
- Assemble the Fan
- Attach the downrod to the motor assembly (if applicable).
- Secure the fan blades to the blade screws using the provided wrench.
- Install the light fixtures and RGB light module (if included).
- Mount the Bracket
- Align the mounting bracket with the ceiling electrical box.
- Attach the bracket using the screws provided. Ensure it’s level and secure.
- Connect Wiring
- Match wires by color:
- Black (Hot) → House black
- White (Neutral) → House white
- Green/Copper (Ground) → House ground
- RGB Wires (if applicable): Connect to the RGB control module per instructions.
- Use wire nuts or connectors to secure connections. Keep wires neat to avoid interference with blades.
- Install the Motor Assembly
- Lift the motor assembly onto the mounted bracket.
- Secure it with the provided downrod screws or bolts.
- Final Connections & Testing
- Connect the RGB remote/control module (follow the manual for wiring/Bluetooth/Wi-Fi setup).
- Turn the power back on and test:
- Speeds: Ensure all 3 speeds (high, medium, low) work.
- RGB Lights: Verify color changes, brightness, and any preset modes.
- Light Fixtures: Confirm bulbs illuminate correctly.
- Secure Loose Parts
- Tighten all screws, blades, and RGB components.
- Clean up tools and debris.
Benefits of a 3-Speed RGB Ceiling Fan Light
- Energy Efficiency
- Adjustable Speeds: Optimize airflow for different needs (e.g., high speed for cooling, low speed for ambient breeze).
- LED Bulbs: RGB LEDs use up to 75% less energy than traditional bulbs, reducing electricity costs.
- Customizable Ambiance
- RGB Lighting: 16 million+ color options and brightness levels to set moods (e.g., warm white for dinners, vibrant colors for parties).
- Includes modes like strobe, fade, and steady light.
- Enhanced Comfort
- 3-Speed Control: Improve air circulation in summer (high speed) or circulate air gently in winter (low speed).
- Reduces reliance on AC by enhancing natural airflow.
- Aesthetic Appeal
- Modern designs complement any décor.
- RGB features add visual interest to rooms.
- Durability & Safety
- LED bulbs last 15,000–25,000 hours (vs. 1,000 hours for incandescent).
- Remote-controlled RGB avoids frequent ladder use for light adjustments.
- Ceiling fans reduce injury risks compared to standing fans.
- Space-Saving
- Combines a fan, light, and RGB features in one unit, freeing up floor space.
- Smart Home Compatibility (Optional)
- Many models work with Alexa, Google Home, or smartphone apps for voice/remote control.
Tips for Success
- Hire an Electrician if unsure about wiring, especially for RGB systems.
- Balance Blades: Use included tools to ensure blades spin smoothly (vibrate less).
- Clean Regularly: Dust blades and lights every 3–6 months for optimal performance.
Enjoy cooler temperatures, customizable lighting, and energy savings with your new 3-speed RGB ceiling fan!